How To Create a Ustream

Ustream allows anyone on the Internet to create their own TV show. Users only need a webcam, a microphone and Internet signal to convey almost any type of content to an audience of millions.

Users can create different channels to produce their own content. Each channel has a unique name, logo, and design configurations. Producers can use designs created by the staff of Ustream, or create your own original appearance to display a single show.

Step by step to create a Ustream

Step 1. Ustream Go to Dashboard. Click your username in the top of the screen or type the address www.ustream.tv / dashboard. If you have not yet created a channel, click on the button “Create Channel”  and assign your new channel.

Step 2. Click the button that says Manage My Channel on the left side of the screen. Click on the "Channel Info . Select the category that best describes your show in the dropdown menu. Tag your channel to relate to the format of your show. Labels or tags allow people to search directly for your show. Add a photo to your channel and describe it for a casual visit to learn more about your show. Click "Save".

Step 3. Select the option "Desing" of the left hand menu. Choose one of the pre-channel designs created by Ustream if you do not like you are currently using. Select the link "I want to customize my theme" to make an original page. Upload a background image if you have one you want to use. If you have no background image, select a color, a color of text and a link color. Click the button Save.

Step 4. Click on the "Settings" in the left menu. Explore the various options to customize your Ustream channel. Select the option "Make your Private Channel"  to require a password to view your channel. Choose "Social Stream Display" Or "Chat Display" To display information from a chat room, Facebook or Twitter directly on your site. Select the option "Comment Moderation to apply moderation of all comments on any video or photo upload to your channel.

Step 5. Sail in the options menu Off air Settings, To finish what your channel when you end the session. Select "Play your Video" to play recorded video. Select "Show Slideshow" to show several pictures during the hours of no transmission. Select "Edit Slideshow" to determine which images are reproduced and hours. Finally, click "Save”.
Read more...

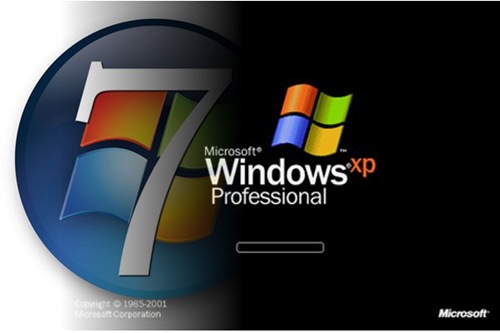
Upgrade Windows XP to Windows 7

With the release of Windows 7, users can upgrade to the latest version of Windows that adds a great feature and also requires less power than Windows Vista. Windows Vista users can also upgrade to Windows 7, But Windows XP users should make a copy of Security files or use a migration tool, as Windows 7 Easy Transfer". All applications must be reinstalled to XP users can do the upgrade.

upgrade windows xp ton windows 7

How to upgrade Windows XP to Windows 7

Step 1. Verify that you upgrade your computer to Windows 7. The easiest way to determine  is to run the free program Windows 7 Upgrade Advisor Microsoft.

Step 2. Make a backup of your data and files, you must complete "wipe-out" And run a "clean installation" Windows 7 on a XP computer. The easiest way to do this is by creating backup copies on an external drive. Other options include copying USB drives, CD, DVD, or post your information to an online resource. You can run the "Windows Easy Transfer" To assist in the implementation of data backup to external drives. This application is included in the installation DVD of Windows 7.

Step 3. Be prepared to reinstall all applications. Before "clean" Your computer, make sure you have copies of all facilities for your applications.

Step 4. Update process begins by inserting the Windows 7 DVD and double click the file "setup.exe" If it starts automatically. You will be prompted to accept the license agreement. Pay attention when the partition option appears. If you want to replace the earlier version of Windows, select the partition that has "the old XP Install”.

Step 5. After full installation of Windows 7, you can copy all files from backup using backup your "new" Installation. Please note that the application "Windows Easy Transfer" Can then be used to accelerate this process.

Step 6. When upgrading, the old version of Windows is a backup directory Windows.old. For this new space, run the utility "Disk Cleanup(Disk Cleanup), which can be found at:Start > All Programs > Accessories > System Tools > Disk Cleanup . Once the application starts, you can click "Clean up system files” and select the option "Previous Windows Installations" . This will remove the old copy of Windows XP security.

Read more...

Install Mac OS X Snow Leopard Server in VMware

Mac OS X 10.6, Snow Leopard, is licensed to run virtual instances on a Macintosh computer. VMware Fusion VMware is the version that runs on Macintosh computers and supports virtualization Mac OS X Server Snow Leopard. You can install Mac OS X Snow Leopard Server on VMware Fusion to take advantage of the benefits of server virtualization.


How to install Mac OS X Server Snow Leopard


Step 1. Insert the installation disk Mac OS X Snow Leopard Server to the drive.

Step 2. Open VMware and click Command and "N" Simultaneously to create a new virtual machine.

Step 3. Click "Apple Mac OS X" In "Operation System" and "Mac OS X Server 10.6 64-bit" In " Version). Click "Continue”

Step 4. Click "Finish" and then the Play button“.

Step 5. Click "Next".

Step 6. Click "Continue" and then"Agree".

Step 7. Click on the virtual hard drive, then click "Install.

Step 8. Click "Continue  twice, then restart the virtual machine.

Step 9. Enter optional information the user registration and click "Continue You can also press "Command  and "Q" Simultaneously to skip the user registration.

Step 10. Click to select the time zone and click "Continue"

Step 11. Enter an account name and password for the server, then click "Continue"

Step 12. Enter the IP network optional information and click "Continue". If the information is not complete, you can use to automatically configure the IP address.

Step 13. Enter a name for the server installation, then click "Continue"

Step 14. Click "Manually configure , then click"Continue" three times in the following screens.

Step 15. Click "Set Up" to create the initial configuration for the server installation.

Step 16. Finally, click "Go"To log on the server.

Read more...

Nokia Gold Specifications, features and prices

Nokia has introduced its new smartphone named Nokia Gold. The same is based on the Symbian operating system Anna. This mobile device includes a body piece gold plated 18-carat high quality leather. It also has a sapphire crystal your Home button.

Its main innovations are based on the model Nokia C7-00 , Which inherits all the basic features. Gold Nokia is equipped with a touchscreen AMOLED 3.5 inch 640 × 360 pixels, 8 GB of internal memory and an 8-megapixel camera with autofocus and dual LED flash, which can record HD video in 720p format.

Nokia Gold

Nokia Gold wireless adapters includes Wi-Fi (IEEE 802.11b / g) and Bluetooth 3.0, MicroSD card slot flash formats, FM tuner and a GPS satellite navigation. It also includes a microUSB port and 3.5 mm headphone jack.

The Nokia Gold is designed for GSM / GPRS / EDGE 850/900/1800/1900 MHz and UMTS / HSDPA 850/900/1700/1900/2100 MHz speculated that its price will be 800 euros. Its official launch is scheduled for the third quarter of 2011.

Read more...

How to remove iTunes account

You can remove an iTunes account by removing the information in your credit card account setup.  If you no longer wish to be subscribed to iTunes and have no need for these, you can edit your payment information.  iTunes is a media application you can use to download songs, videos, podcasts and audiobooks.  In addition, you can sync media files to your iPod, iPhone, iPad.

How to cancel an iTunes account

Step 1. Double-click the iconi Tunes To load the multimedia application.

Step 2. Press "Store" , and then click "Sign In”.

Step 3. Enter your username and password.

Step 4. Click "Store"And click "View My Account".

Step 5. Click on "Edit Payment Information" Click on the "None" next to "Credit Card" . Then click Done.

Read more...

How to hide my Facebook picture

Facebook allows users to upload images to photo albums. By default, your Facebook friends can see all the images you upload and search through your albums. You hide images changing the privacy settings of the album in which they are. Your Facebook photo albums may be private (only you), hidden from all but specific friends or hidden to specific individuals. Each image uses the privacy settings of the album that is, the images do not have their own privacy settings.

Steps to hide my Facebook picture

Step 1. Open your Facebook profile page on facebook.com and click on the link "Photos" on the left of the page.

Step 2. Click the album containing the image you want to hide.

Step 3. Click the link "Edit Album" above the picture album.

Step 4. Click the box to the right of "Privacy" and click on"Customize"

Step 5. Click the box below it "Make This Visible To" and click "Only Me"

Step 6. Finally, click on the button Save Settings

Read more...

How to unblock a contact in Messenger

Windows Live Messenger, Which is the new name of the program MSN Messenger, Microsoft Corporation, lets you Friends unlocked, Admitting to your list of contacts another go. When using Windows Live Messenger, you can block contacts, to avoid sending messages. The program then adds them to a special list containing the names of all contacts you've blocked. You unblock a contact in Messenger with just a few steps.

How to unblock a contact in Messenger

Step 1. Open Start menu and clicking "Windows Live Messenger" Folder "All Programs"  Log into the service if it does it automatically.

Step 2. Click on the menu Tools at the top of the window and select Options

Step 3. Select "Privacy" in the left panel, then select the name of the friend you want to unblock the blocked contacts list.

Step 4. Finally, click on the button Allow to unlock the friend. Click "Ok To confirm the changes.

Read more...